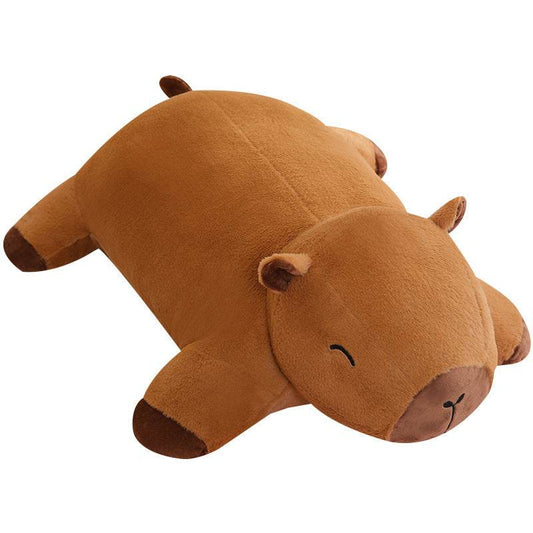
How to Restuff a Flat or Deflated Plushie (The Right Way)

Your plushie used to sit up. Now it just... lies there. Flat, floppy, a little sad-looking — like it's given up.
That's not damage. That's just stuffing fatigue, and it's one of the easiest plushie fixes there is — if you do it right. Most guides tell you to "cut a seam, add stuffing, sew it shut." Technically true. Also how you end up with a lumpy plushie, a visible scar down its back, and a slightly crooked head.
After working with thousands of plushies — repairing them, restuffing them, and designing ones that are actually built to be reopened — here's the version of this guide that covers what the others skip.
Why Plushies Go Flat in the First Place
Polyester stuffing doesn't disappear — it compresses. Every hug and flop onto the bed packs the fibers into denser clumps. Less air between fibers means less volume, even though the stuffing's all still in there. That's why cheap stuffing goes flat faster, and why the fix isn't always "add more."
Before you grab a needle, try this: knead the plushie gently all over like dough, squeeze the flattest spots, give it a shake. Sometimes that alone redistributes clumped stuffing and you're done — no surgery required. Still flat or lopsided? Keep reading.
Step 1: Find the Seam (Without Creating a New Hole)

Most plushies have one factory restuffing seam — usually along the back, bottom, or
belly — that's a touch looser or straighter than the others. Run your fingers along every seam before cutting anything; you're feeling for the one with slightly more give. Mark it with a pin before you cut, so you don't lose it once the fur springs back over it.
If the fur is long, brush it away from the seam line first. Cutting blind through thick fur is how people accidentally snip the fabric instead of just the thread.
The shortcut nobody talks about: if your plushie has a zipper instead of a sewn seam, skip this step entirely. Unzip, restuff, zip shut — done. No seam ripper, no guesswork. It's the difference between a 3-minute fix and a 20-minute one, and exactly why most Goodlifebean plushie ships with a hidden zipper built in.
Step 2: Audit What's Already In There — Don't Just Add More
Before adding anything new, reach in and feel around for hard, compacted clumps (especially near the bottom or any spot that gets squeezed a lot) and uneven distribution. Pull out dense clumps and break them apart by hand. Old, flattened polyfill can sometimes be fluffed back up and reused deep inside a limb, but for anything that affects the outer shape — belly, head, back — fresh stuffing will always look better.
This one step is the difference between a plushie that looks "restuffed" and one that looks brand new.
Step 3: Use the Right Stuffing
Skip cotton balls, fabric scraps, or old pillow stuffing — they clump permanently. Stick with high-loft polyester fiberfill (polyfil), the same material used inside most quality plushies. It's lightweight, holds shape, and resists clumping far longer than cheap alternatives.
Underrated tip: tear stuffing into small, loose pieces — golf-ball sized, not big handfuls. Small pieces let you control density precisely and avoid the lumpy look that comes from cramming in big wads at once.
Want extra weight for comfort or sensory use? This is the moment to add a small fabric pouch of poly pellets or weighted beads to the base before layering fiberfill on top. Skip loose rice — it attracts pests and breaks down over time.
Step 4: Stuff With a Shape in Mind, Not Just "Until It's Full"

Professionally made plushies use density variation — different firmness in different zones — for that natural, huggable shape instead of a stiff, overstuffed look.
| Area | Firmness |
|---|---|
| Feet, base, bottom | Firm |
| Tummy, cheeks, paws | Soft |
| Limbs and ears | Medium |
Work from the extremities inward — ears, paws, tail first (use a chopstick or pencil's blunt end for narrow spots), then limbs, then the main body. Stuff body-first and you'll often find you can't pack enough into the smaller parts afterward.
Add stuffing in small amounts and check the shape every few handfuls — aim slightly fuller than you think you need, since it compresses naturally within the first few days of handling.
The mistake that ruins more restuffs than anything else: overstuffing right at the seam opening. Leave a little slack there, or you'll fight the fabric to close it — and that's how seams pop again within a month.
Step 5: Close It Without Leaving a Scar
If you went the seam-ripper route, use a ladder stitch (invisible stitch) — it folds both fabric edges inward and catches thread between them, keeping the stitching buried instead of sitting on top of the fabric.
A few details that make a real difference: double-thread your needle (single thread snaps under seam tension more than people expect), tighten gently every few stitches instead of all at once at the end, and brush fur away from the seam as you go, not just before you start — trapped fur is the most common reason restuffed plushies look "off" afterward.
If your plushie has a zipper, you're already done — just zip it up and give it a fluff.
Step 6: Fluff, Shake, Let It Settle
Give your plushie a good shake and a few gentle squeeze-and-releases to redistribute any stuffing that shifted while sewing or zipping. Don't worry if it feels slightly firmer than usual — that softens within a few days of regular cuddling as the fresh fiberfill settles in.
How Often Should You Restuff a Plushie?
There's no fixed schedule — it depends entirely on how much love (read: squeezing) your plushie gets. As a general guide:
- Daily cuddle companions: check shape every 6–12 months
- Display or occasional-use plushies: rarely need restuffing at all
- Well-loved childhood plushies: often benefit from a full restuff every couple of years to keep them from going permanently flat
If you're restuffing the same plushie every couple of months, that's usually a sign the seam wasn't closed tightly enough last time — or that it's a good candidate to switch to a zippered closure going forward, so future top-ups take seconds instead of a sewing session.
When Restuffing Isn't Enough
Sometimes a plushie is flat not because of compressed stuffing, but because the fabric itself has stretched, worn thin, or developed multiple weak seams from age. In that case, restuffing alone won't hold — you'll want to reinforce the fabric first. We cover that whole process, including how to handle fragile vintage plushies, in our complete guide to repairing torn and damaged plushies.
And if you're shopping for a new plushie and want to skip this whole process for years to come, look for one with a zipper closure built in from the start — it's the single biggest quality-of-life difference for anyone who actually uses their plushies instead of just displaying them.
Why We Build Goodlifebean Plushies With a Zipper
We didn't add zippers to our plushies as a gimmick. We added them because we've restuffed enough plushies the hard way to know it shouldn't be this difficult.
94% of our plushies in our Plushies & Stuffed Animals collection ships with a discreet, hidden zipper, so you can:
- Restuff it in minutes whenever it starts going flat — no seam ripper, no guessing where the seam is
- Remove the stuffing entirely to spot-clean or machine-wash just the outer "skin" without risking the filling
- Add weight (poly pellets, weighted beads) yourself if you want a more grounding, sensory-friendly feel — popular with our Emotional Support and Anxiety-Relief Plushies
- Keep a plushie for life instead of replacing it once it goes flat — especially helpful for our Giant Plushies and Teddy Bears, which take a lot more stuffing to begin with
If you're tired of cutting into seams and hoping your stitching holds, browse our full plushie collection — every single one is designed to be opened, refreshed, and loved for years, not just one cuddle season.